How to Access Softdocs Forms for Staff and Faculty
Jenzabar One (J1) Cloud is available via web browser (i.e. Google Chrome, Firefox, Safari, Etc.) on your Windows or Mac computer. This process is only for authorized Jenzabar users at Diné College. If you are unsure about your access, please coordinate with your direct supervisor. Using this procedure does not require a VPN connection to the Diné College network if working off site..
Need help or have questions? Please contact the IT Department at (928) 724-6675 or submit an IT Help Desk ticket (Recommended) here: IT Ticketing System
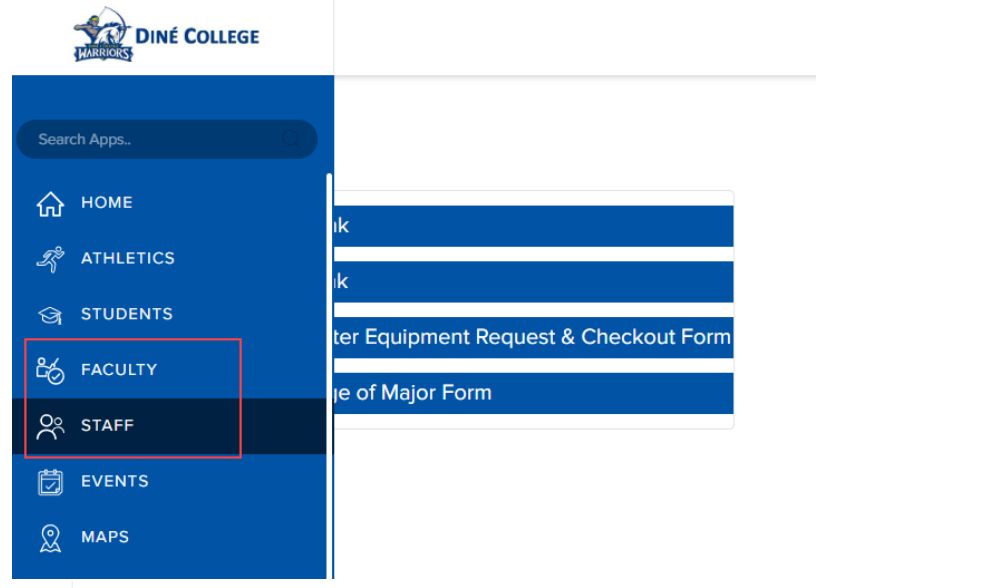
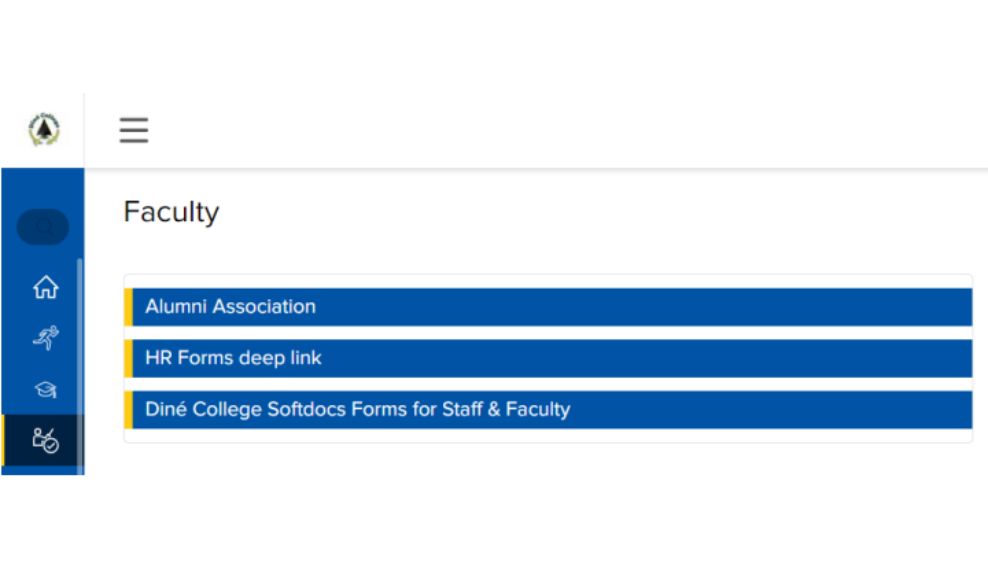
Step 2: Click on the left blue side bar and select either staff or faculty and you will see
“Diné College Softdocs Forms for Staff & Faculty.
Step 3:
Step 4:
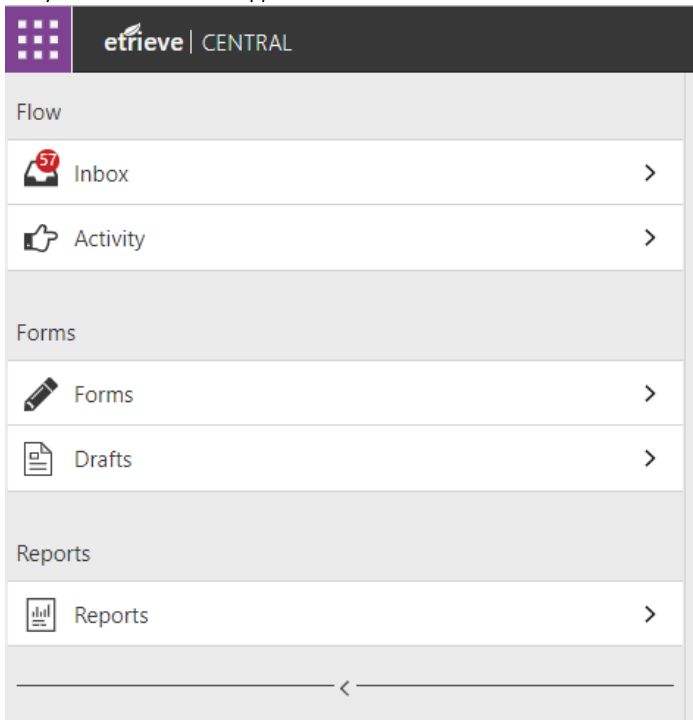
Step 5: You will be directed to your SoftDocs Etrieve Central Flow; Inbox, Activity log, Forms, & Drafts. Click on Forms and your forms menu will appear
Step 6:
Step 7: Your Inbox will show forms that require your attention if there is a RED dot that shows the number of forms that are in your queue. As part of the workflow, you will also receive emailed notifications that there is a form for you to process
Step 8: Your Activity will show everyone who worked (was a part of the workflow). No action can be done in your “Activity” menu other than to View the form history, download, and print. This is a digital log of all forms in
which you were a part of.
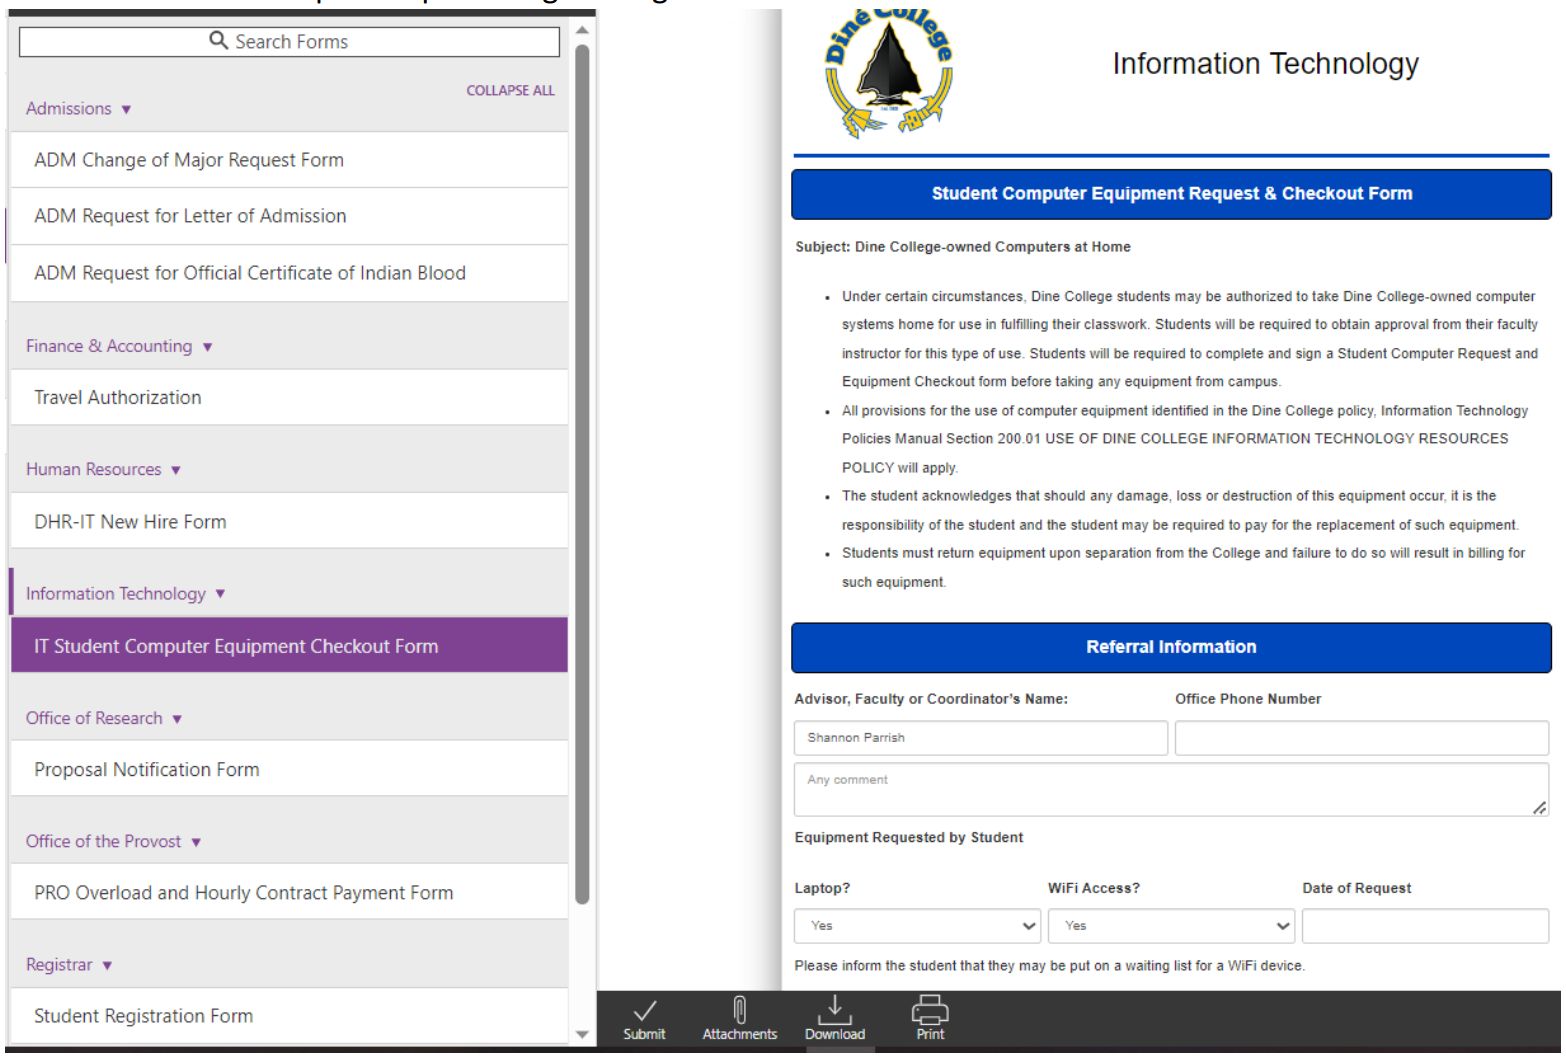
Step 9: By clicking on Forms, your forms menu (the forms for which you have access to) will appear.
Step 10: Click on the form to open it up and begin filling it out
Step 11:
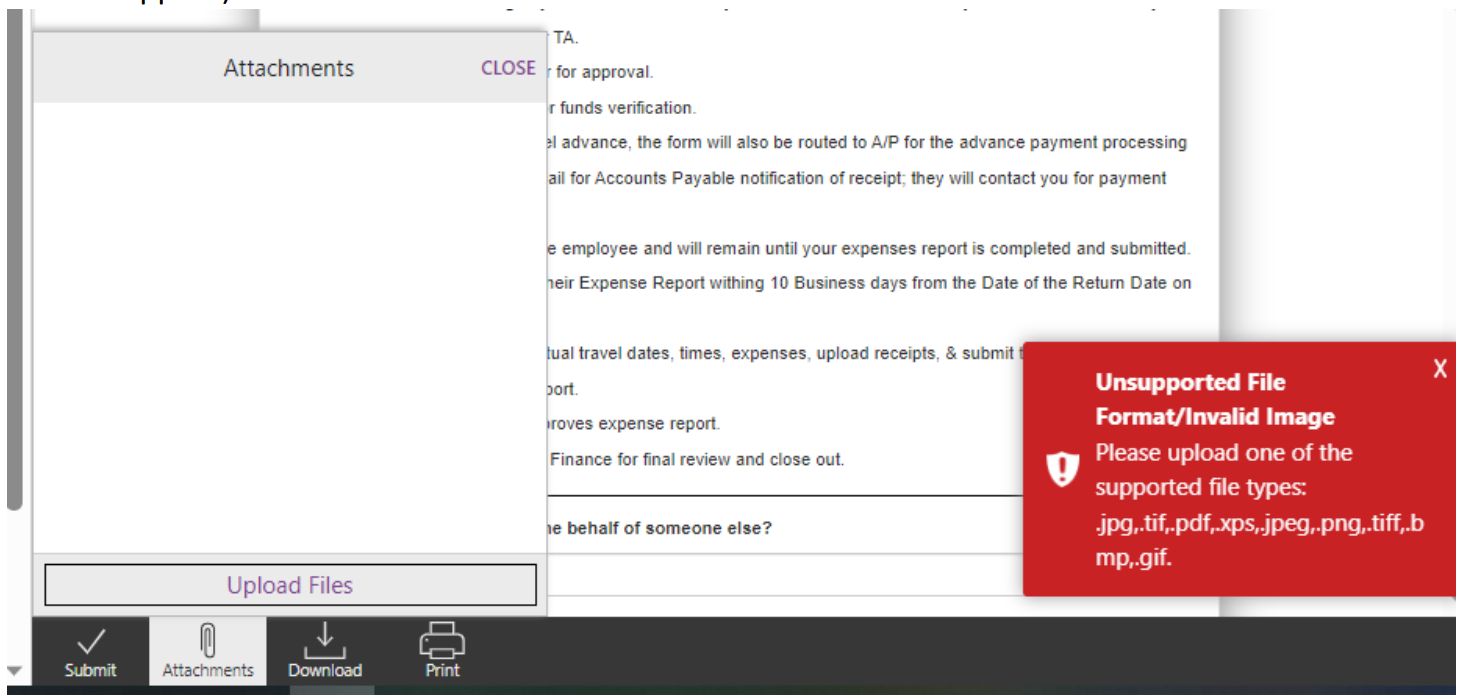
Step 12: As the form initiator or submitter, you will complete all applicable and/or required data fields and click submit (located and the bottom of the form screen). You have the option to upload any supporting documentation (supported file types to upload are JPG, TIF, PDF, XPS, JPEG, PNG, BMP, GIF) unsupported file types will cause an
error to appear).
Step 13:
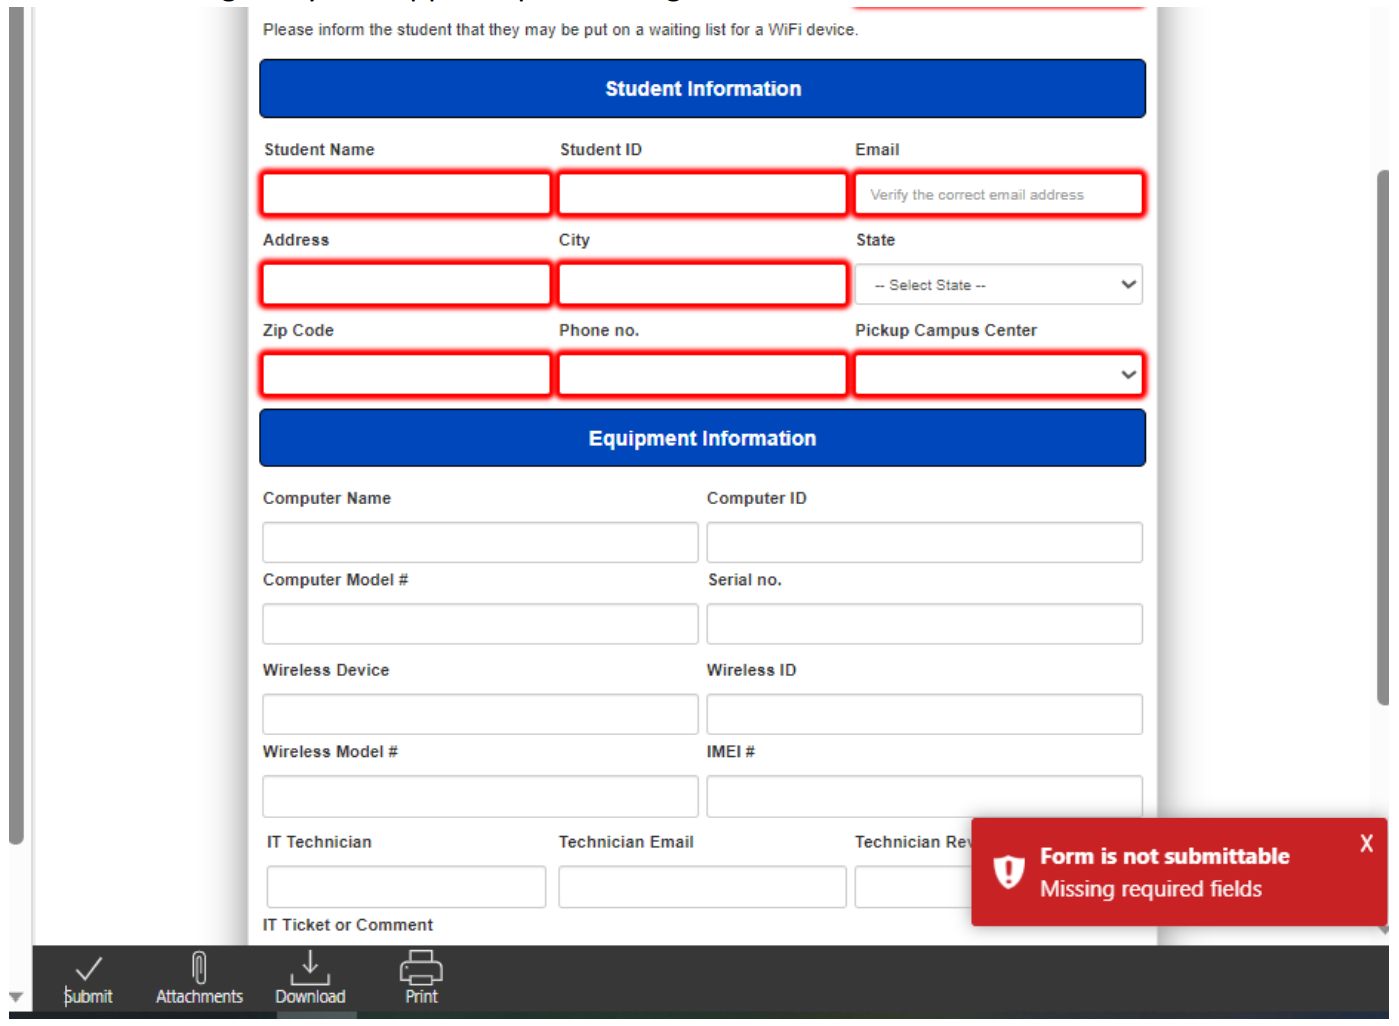
Step 14: An error message may also appear upon clicking SUBMIT, if a REQUIRED FIELD has not been filled out:
Step 15:
Step 16: Upon successful completion of the form, a message that the form was submitted will appear:
Step 17:
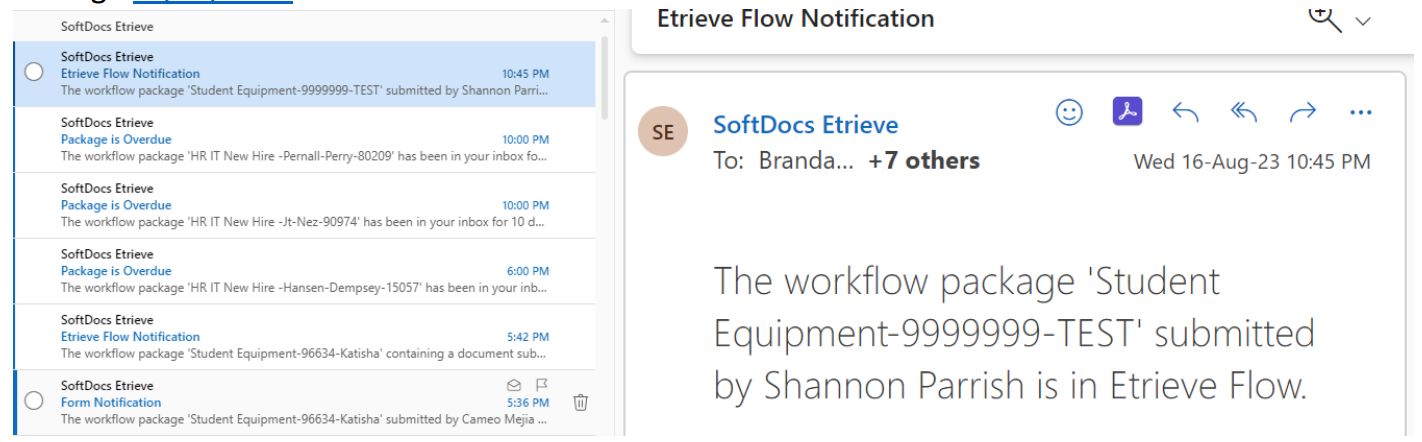
Step 18: The form will move to the next step in the workflow, which could be an individual or a group.
Step 19: They will receive emailed notifications in their DC email account; they can also access directly by navigating through mydcportal to the SoftDocs forms tab as shown above.
Step 20:
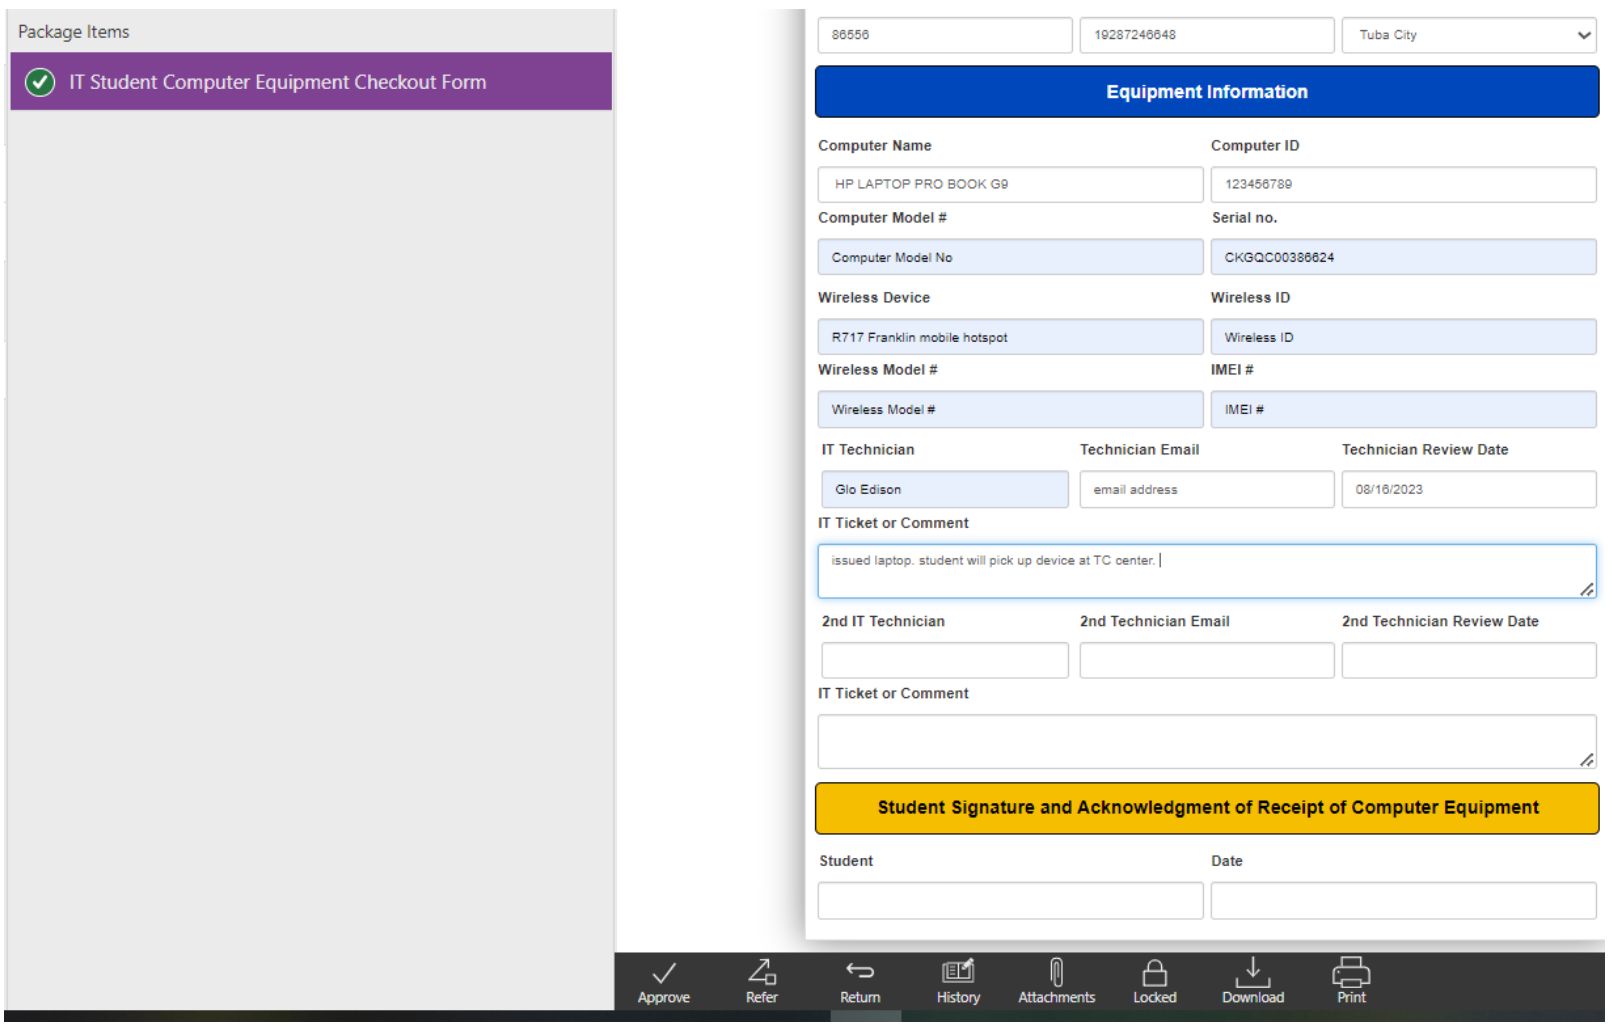
Step 21: The first recipient(s) in the workflow steps will open the form and complete their section to enter data.
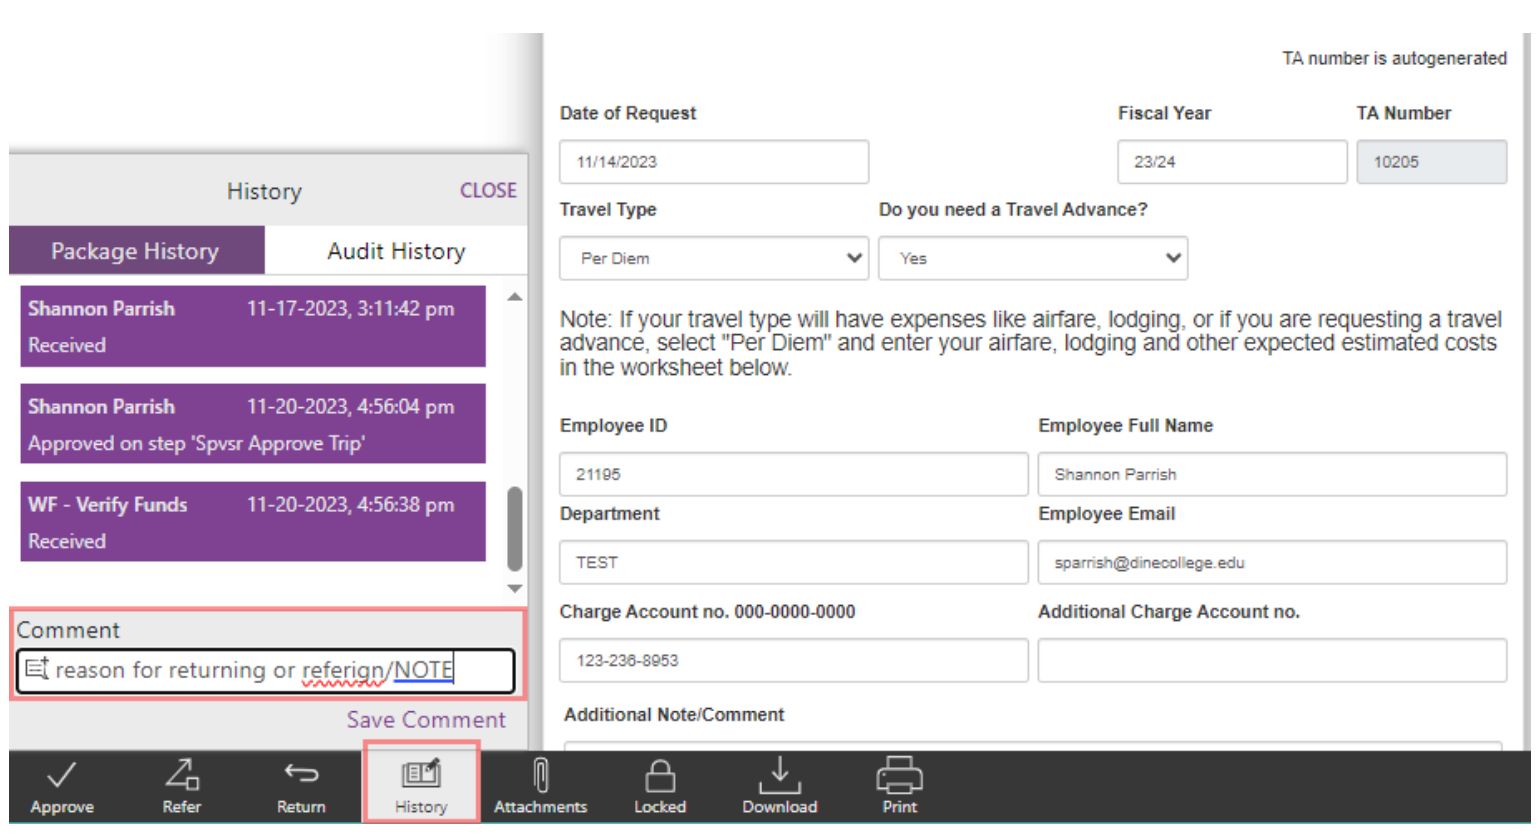
Step 22: The recipient will have “action” options to APPROVE, REFER to another user, RETURN to the submitter, view the form HISTORY, Upload ATTACHMENTS, LOCK AND UNLOCK the form if it is locked by another user, DOWNLOAD, and PRINT.
Step 23: If you wish to refer the form to another person; it will go to them to take action.
Step 24: If you wish to Return the form to the submitter or another person within the workflow; it will be returned to that person and will come back to you to approve.
Step 25: TO LEAVE A NOTE OR REASON AS TO YOUR REFER OR RETURN; CLICK ON THE HISTORY ICON AND NEW COMMENT. ENTER YOUR COMMENT, SAVE, AND THEN APPROVE, REFER, OR RETURN.
Step 26:
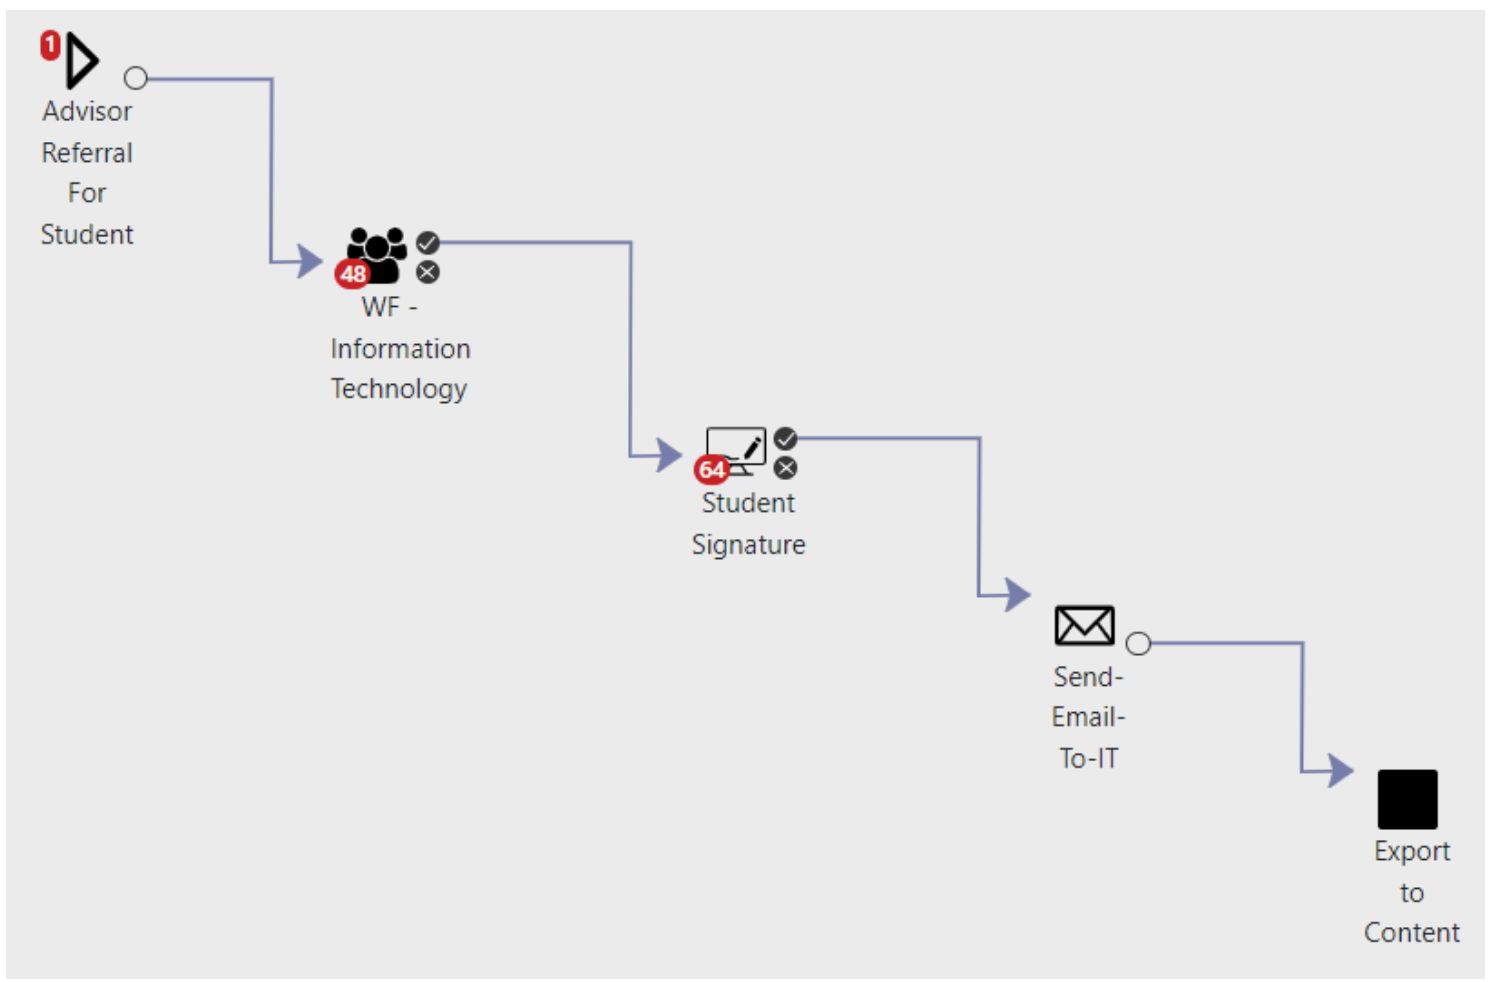
Step 27: The form will move through the workflow until it ENDS or in this case, will be imported into the student’s electronic document repository, Etrieve Content:
Step 28:
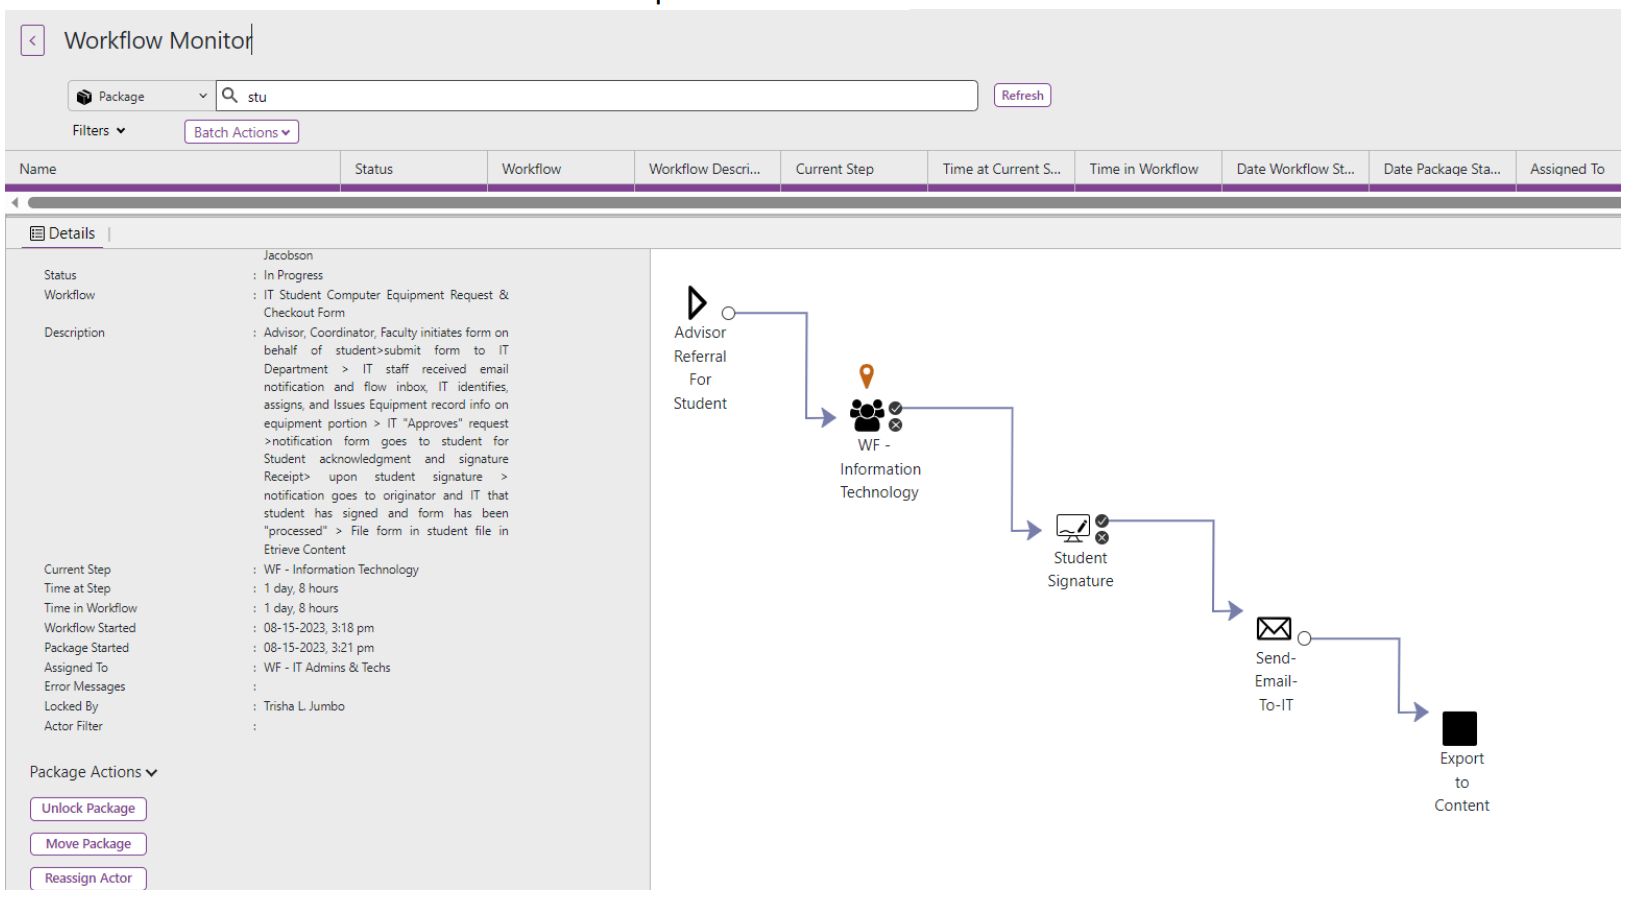
Step 29: Form Monitoring and Form Workflow Administration.
Step 30: Department form owners, module owners, and designated frequent form users, will be assigned to act as form
administrators and will have the responsibility to MTR (monitor, track, and report) on forms within their
departments.
Step 31: They have the authorization to assist with UNLOCKING forms, RE-ASSIGNING forms to another user, and MOVING forms back or forward to another step in the workflow.
Step 32:
For assistance, requests, and further forms training, please submit an IT Helpdesk ticket